The much-awaited JavaScript Swiss Army knife, Bun, has finally released its 1.0 version, and it's a game-changer. If you're new to the scene, Bun serves as an all-in-one JavaScript runtime and toolkit, engineered for blazing speed. It comes complete with a bundler, test runner, native TypeScript and JSX support, and even a Node.js-compatible package manager.
In this guide, we're diving into the world of Bun 1.0 to unlock its full potential. We'll cover:
-
🛠️ Installation process for Bun
-
🌱 Your first Bun project
-
🖥️ Creating your inaugural Bun server
-
🎭 Server-side rendering with Bun streams and React
-
📦 Fetching 3rd party data and rendering server-side
Project Setup
Install Bun
You can install Bun alongside your current node installation without messing up any of your other repositories.
# Install Bun
curl -fsSL https://bun.sh/install | bash
Initialize Bun Project
Next, let's initialize a new Bun project.
# Project setup
mkdir bun-httpserver
cd bun-httpserver
bun init
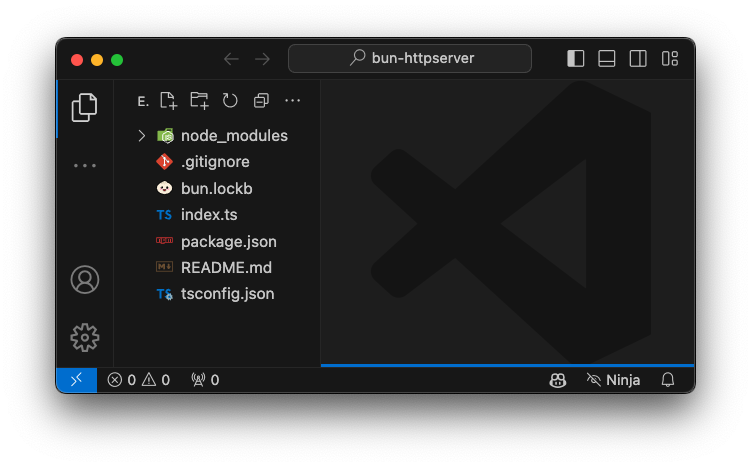
Using bun init will scaffold out a project, as you can see in the following screenshot. You'll notice a new file, bun.lockb, which takes the place of yarn, npm, or pnpm lock files. Also, index.ts and tsconfig.json are both scaffolded by default, which means TypeScript support is baked right in, and no extra setup is required.
Your First Bun Server
Believe it or not, setting up your first Bun server is remarkably simple. You can get up and running with just a couple of lines of code.
const server = Bun.serve({
  port: 3000,
  fetch(req) {
    return new Response(`Bun!`);
  },
});

console.log(`Listening on http://localhost:${server.port} ...`);
Look a bit closer at each line ...
-
const server = Bun.serve({ ... });: This line initializes the server usingBun.serve()and sets it to listen on port3000. -
port: 3000,: Specifies that the server should listen on port3000. -
fetch(req) { ... }: Defines a function that will handle all incoming HTTP requests. When a request comes in, it returns a new HTTP response with the text "Bun!". -
return new Response(Bun!);: Creates a new HTTP response object with the text "Bun!". -
console.log(Listening on http://localhost:${server.port} ...);: Logs a message to the console, indicating that the server is listening. It uses template literals to insert the port number dynamically.
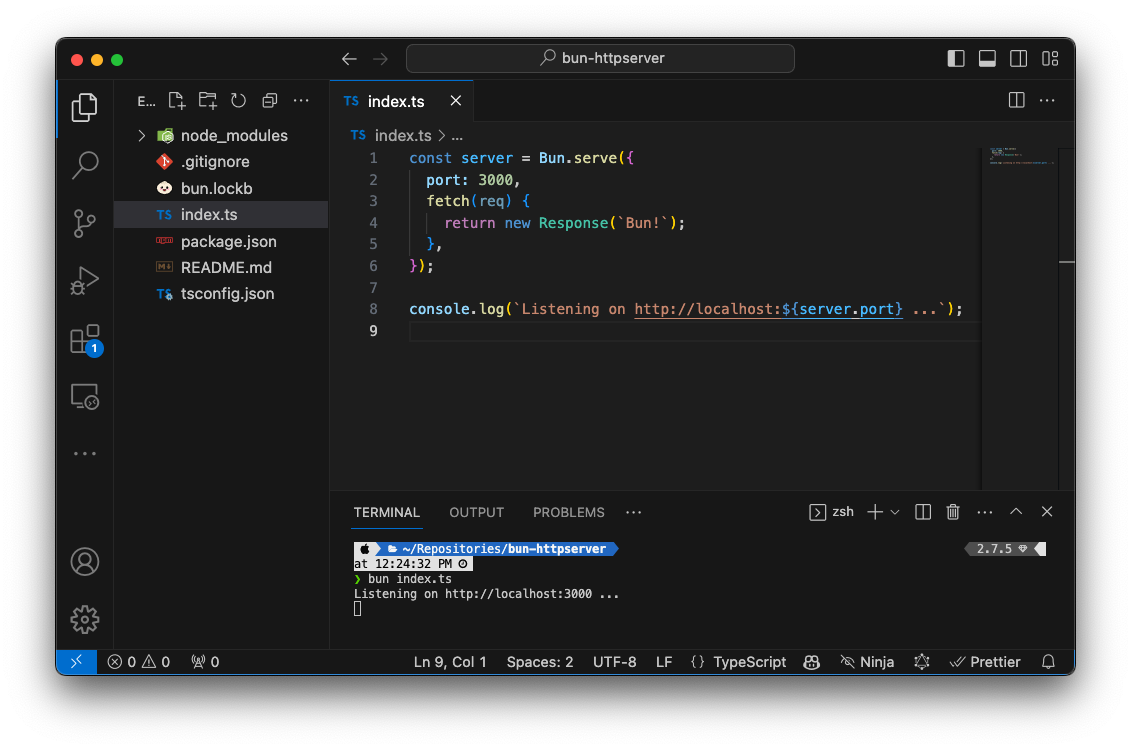
Your entire project should now look like the following screenshot.
Implementing Server-Side Rendering (SSR) with React and Bun
Now the Real Fun Starts: Implementing Server-Side Rendering (SSR) with React and Bun. In this section, we'll dive into the intricacies of Server-Side Rendering, or SSR as it's often abbreviated, using both React and Bun.
Adding Packages the Bun Way
If you're familiar with yarn, you'll feel right at home here. To add packages in Bun, simply use the add command. Want it as a dev dependency? Just throw in the -d flag.
bun add react react-dom
bun add @types/react-dom -d
Switching Gears to JSX
Next up, we're going to transition our existing index.ts server file to index.tsx. This allows us to return JSX elements directly.
mv index.ts index.tsx
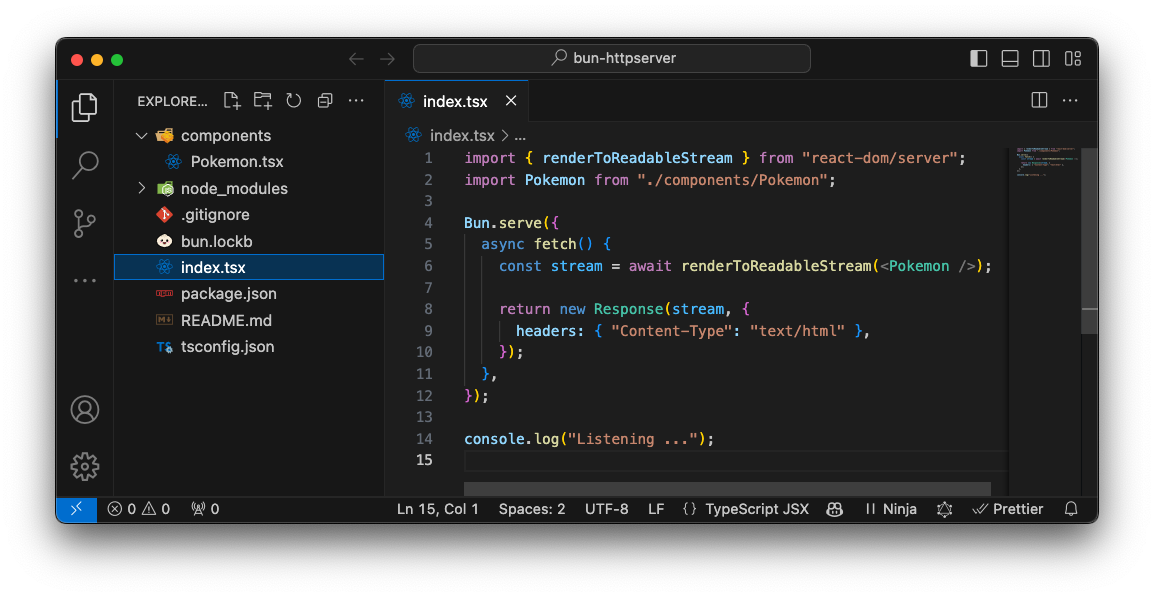
Diving into Our New index.tsx
In this revamped index.tsx file, we're using renderToReadableStream from react-dom/server to render our Pokemon component. We then wrap this stream in a Response object, ensuring the content type is set to "text/html".
import { renderToReadableStream } from "react-dom/server";
import Pokemon from "./components/Pokemon";

Bun.serve({
  async fetch(request) {

    const stream = await renderToReadableStream(<Pokemon />);

    return new Response(stream, {
      headers: { "Content-Type": "text/html" },
    });
  },
});

console.log("Listening ...");
Ok, more is going on here. Let's take a look.
-
import { renderToReadableStream } from "react-dom/server";: Imports the functionrenderToReadableStreamfrom thereact-dom/serverpackage for server-side React rendering. -
import Pokemon from "./components/Pokemon";: Imports a React component namedPokemonfrom a relative file path. -
Bun.serve({ ... });: Uses theBun.serve()method to set up an HTTP server. It includes an asynchronousfetchfunction to handle incoming HTTP requests. -
async fetch(request) { ... }: An asynchronous function that will be triggered for each HTTP request coming to the server. -
const stream = await renderToReadableStream(<Pokemon />);: Asynchronously renders thePokemonReact component to a readable stream. -
return new Response(stream, { ... });: Returns a new HTTP Response object with the readable stream and sets the "Content-Type" header to "text/html". -
console.log("Listening ...");: Outputs a message to the console indicating that the server is listening for incoming requests.
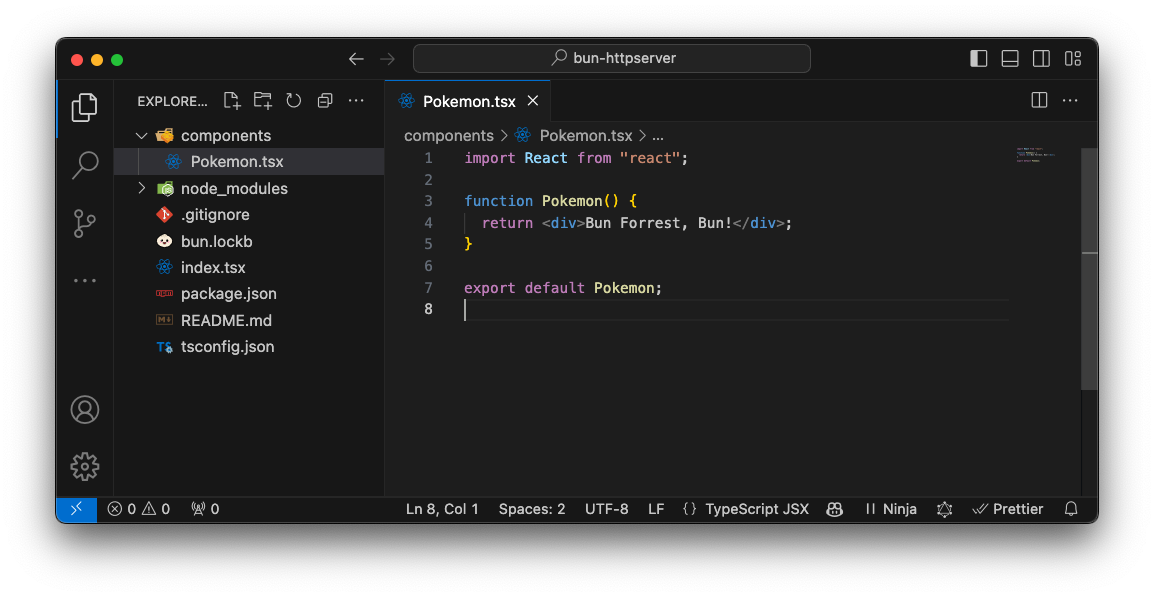
Crafting a Streamable React Component
Finally, we're going to build a straightforward React component. This component will be server-side rendered (SSR) and streamed right back to the client.
import React from "react";

type PokemonProps = {
  name?: string;
};

function Pokemon() {
  return <div>Bun Forrest, Bun!</div>;
}

export default Pokemon;
Firing Up the Bun Serve
Next is the exciting part—let's run our Bun server and see everything come together!
bun index.tsx
Navigate to http://localhost:3000 and you should see our SSR Pokemon component!

Building Dynamic Routes with a Pokémon Twist
Ready for something more advanced? In this section, we'll be creating two distinct routes: /pokemon and /pokemon/[pokemonName].
-
Navigating to
/pokemonwill trigger a fetch request to the Pokémon API, rendering the results as a clickable list of anchor tags. -
Clicking any of these anchors takes you to
/pokemon/[pokemonName], where a specific Pokémon is fetched, server-side rendered (SSR), and then streamed back to your client.
A Closer Look at Our Enhanced index.tsx
In this updated version, our index.tsx is doing some heavy lifting. It now includes dynamic routing to either show a list of Pokémon fetched from the Pokémon API or to display a specific Pokémon based on the URL. Whether it's the list or an individual Pokémon, the component is server-side rendered and then streamed back to the client.
import { PokemonResponse } from "./types/PokemonResponse";
import { PokemonsResponse } from "./types/PokemonsResponse";
import { renderToReadableStream } from "react-dom/server";
import Pokemon from "./components/Pokemon";
import PokemonList from "./components/PokemonList";

Bun.serve({
  async fetch(request) {
    const url = new URL(request.url);

    if (url.pathname === "/pokemon") {
      const response = await fetch("https://pokeapi.co/api/v2/pokemon");

      const { results } = (await response.json()) as PokemonsResponse;

      const stream = await renderToReadableStream(<PokemonList pokemon={results} />);

      return new Response(stream, {
        headers: { "Content-Type": "text/html" },
      });
    }

    const pokemonNameRegex = /^\/pokemon\/([a-zA-Z0-9_-]+)$/;
    const match = url.pathname.match(pokemonNameRegex);

    if (match) {
      const pokemonName = match[1];

      const response = await fetch(`https://pokeapi.co/api/v2/pokemon/${pokemonName}`);

      if (response.status === 404) {
        return new Response("Not Found", { status: 404 });
      }

      const {
        height,
        name,
        weight,
        sprites: { front_default },
      } = (await response.json()) as PokemonResponse;

      const stream = await renderToReadableStream(<Pokemon name={name} height={height} weight={weight} img={front_default} />);

      return new Response(stream, {
        headers: { "Content-Type": "text/html" },
      });
    }

    return new Response("Not Found", { status: 404 });
  },
});

console.log("Listening ...");

A lot is going on here. Let's dive deeper into the interesting pieces.
-
Initialize HTTP Server with Bun: The
Bun.serve()method sets up an HTTP server and specifies an asynchronousfetchfunction to handle incoming requests, effectively acting as the entry point for all HTTP traffic. -
Route for All Pokémon: When the URL path is
/pokemon, the server fetches a list of Pokémon from an external API and renders aPokemonListReact component to HTML. This HTML is then sent back to the client. -
Route for Specific Pokémon: The code uses a Regular Expression to match URL paths that specify a particular Pokémon's name (e.g.,
/pokemon/pikachu). If such a path is detected, the server fetches details for that specific Pokémon and renders it using thePokemonReact component. -
Server-Side React Rendering: For both the general and specific Pokémon routes, the
renderToReadableStreamfunction converts React components to a readable stream, which is then returned as an HTML response. -
Error Handling: The code includes specific handling for 404 errors. If a Pokémon is not found in the API or if the URL doesn't match any expected routes, a "Not Found" message is returned with a 404 status code.
The PokemonList Component
This component is taking the list of Pokemon and turning them into clickable list items. Each list item is an anchor tag that routes the user to /pokemon/[name] when clicked, rendering individual Pokémon details.
import React from "react";

function PokemonList({ pokemon }: { pokemon: { name: string; url: string }[] }) {
  return (
    <ul>
      {pokemon.map(({ name }) => (
        <li key={name}>
          <a href={`/pokemon/${name}`}>{name}</a>
        </li>
      ))}
    </ul>
  );
}

export default PokemonList;
The Pokemon Component
The Pokemon component is responsible for taking an individual Pokemon's height, weight, name, and image URL, and returning exactly how we want to display a single Pokemon.
import React from "react";

function Pokemon({ height, weight, name, img }: { height: number; weight: number; name: string; img: string }) {
  return (
    <div>
      <h1>{name}</h1>
      <img src={img} alt={name} />
      <p>Height: {height}</p>
      <p>Weight: {weight}</p>
    </div>
  );
}

export default Pokemon;
Re-running the Server with HMR
Time to restart our server, but this time let's add the --watch flag for Hot Module Reloading (HMR). Good news—Bun has us covered, so you can say goodbye to nodemon.
bun --watch index.tsx
Dynamic Routes in Action
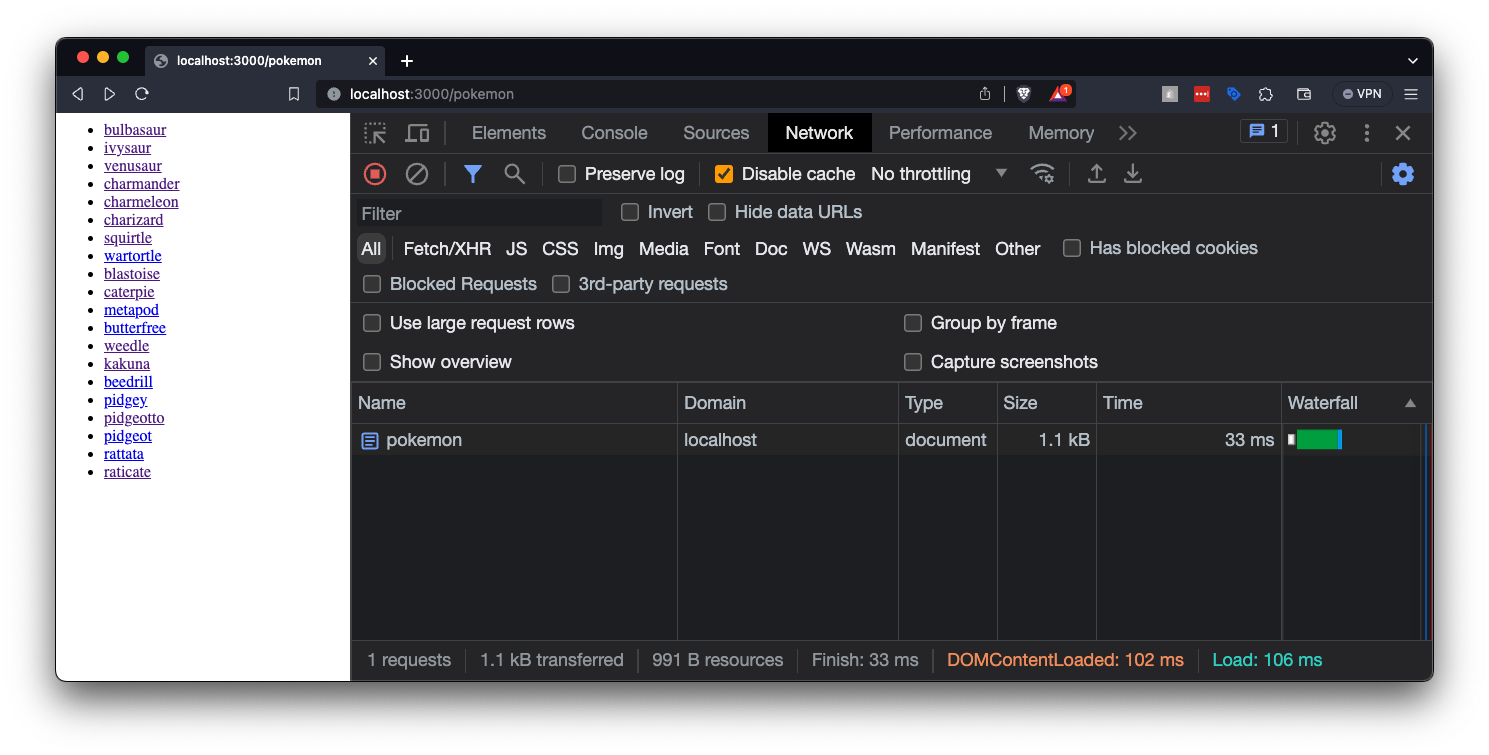
The first screenshot shows you what happens when you navigate to /pokemon. As you can see, a list of Pokémon appears, each one being a clickable link. All this is happening thanks to our PokemonList component, which fetches and displays clickable names.
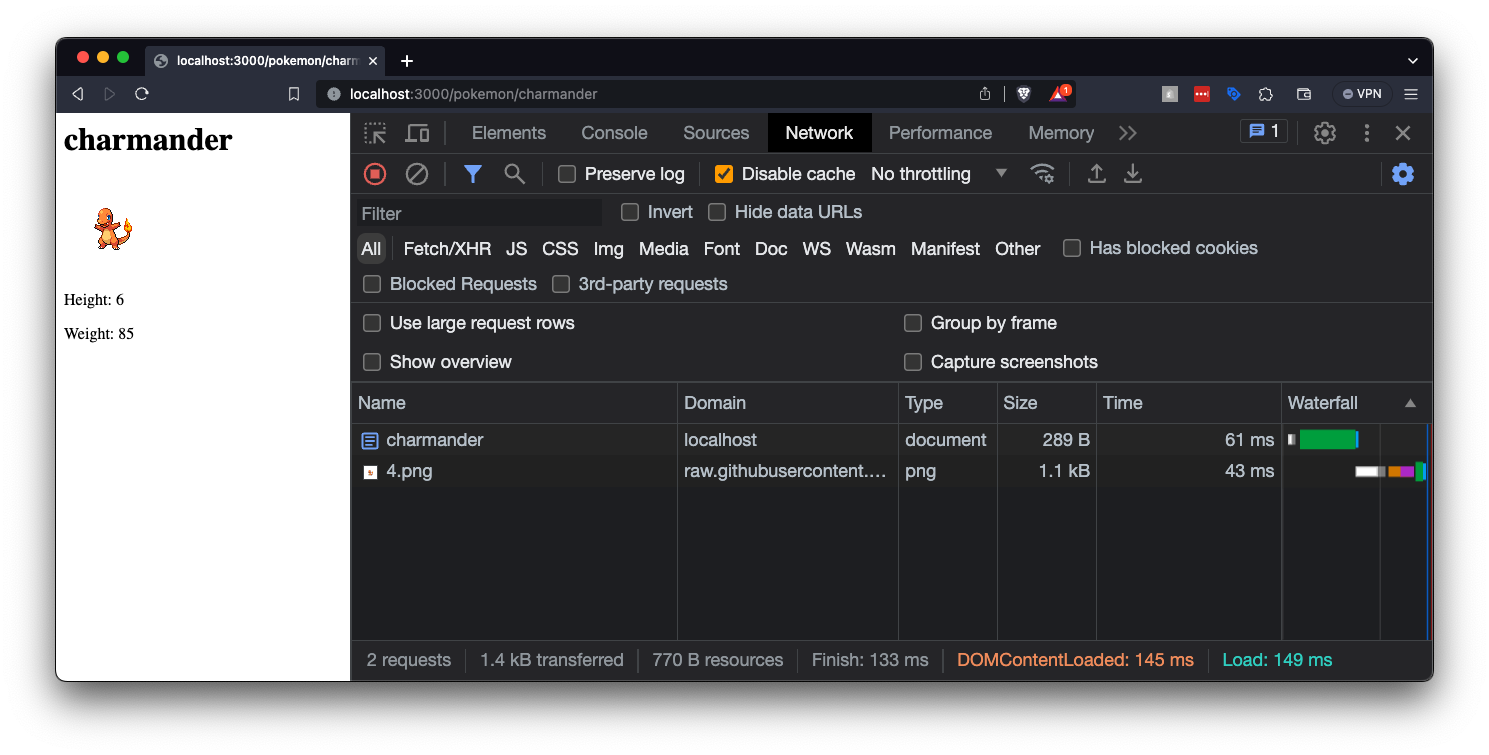
The second screenshot takes us to /pokemon/charmander. This time, our Pokemon component takes center stage, showing Charmander's height, weight, and an image—everything beautifully server-side rendered, of course.
That's All, Folks!
If you've been coding along, give yourself a pat on the back! You've just:
-
🛠️ Installed and initialized a shiny new Bun project
-
🌐 Created your very own HTTP server
-
🖼️ Utilized Server-Side Rendering (SSR) to stream a simple React component
-
🗺️ Constructed two distinct routes that fetch data and SSR different React components
Feel free to leave a comment or hit that like button if you found this useful or entertaining and follow me on Twitter!
Until next time, happy coding! 🚀