In this post, we are going to learn how to add external links and blog series links to the Hashnode navbar.
Adding custom navbar links to your blog's home page is a great way to direct your readers to all of your other work!
Let's take a look! 👇
Finding your Navbar Settings
To start, we will need to navigate to your Blog Dashboard.
There are actually two ways to get here ...
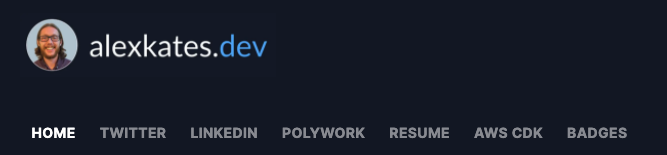
The first way is to go to your Blog Home e.g., https://alexkates.dev, and click the toolbox icon in the top-right of the page.

The second way is to click your logo in the bottom-left of the page and then click Blog Dashboard
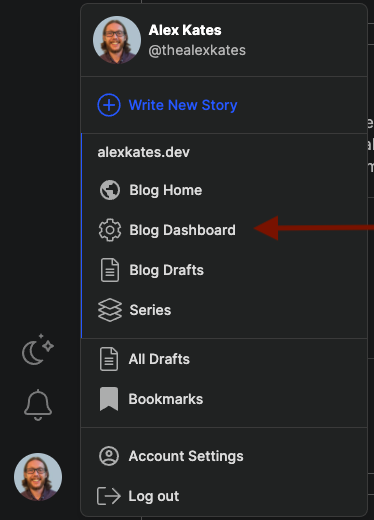
Now that we are in our Blog Dashboard we will need to navigate to the Navbar section.

Adding an External Link
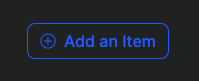
Start by clicking Add an Item at the bottom of the page.
For a new External Link, make sure the type dropdown is set to Link.
The label will be the text shown in your Navbar e.g., Twitter.
The value will be the actual URL e.g., https://twitter.com/thealexkates.
The priority is how you control the order of your links. The highest priority is always the left-most link.

Don't forget to click Save when you are finished.
Adding a Series Link
For a new Series Link, follow all of the steps from the External Link except for a couple of options.
The type dropdown will be Series instead of Link.
The value will be a dropdown with any series you've created in the past.

Wrapping up
I hope this post helps you re-think how you are using your Hashnode navbar! Please consider following me at https://alexkates.dev/